How to Set Up Outlook to Send and Receive Email ?
- Open Outlook. Select Account Settings... from the Tools menu.*

- On the E-mail tab, click New.*

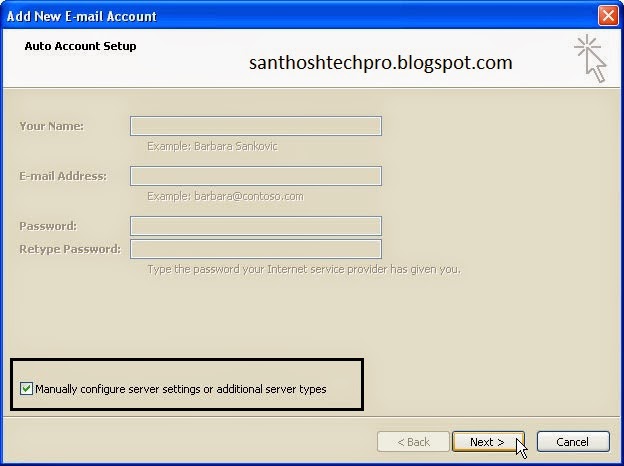
- Select "Manually configure server settings or additional server types" and click Next *
- Select Internet E-mail and click Next *

- Enter the following information for E-mail Accounts. *o Your Name: Enter the name you wish recipients to see when they receive your message.o Email Address: This is the address that your contacts' email program will reply to your messages. This is also the address that will get recorded in your contacts' address book if they add you as a contact.o Account Type: POP3o Incoming mail server: Enter pop3.mail server name.com Eg: For gmail “ pop3.gmail.com”,o Outgoing mail server (SMTP): Enter smtp.mailservername.com Eg : For Gmail “ smtp.gmail.com’,o User Name: Enter your full e-mail address eg:123@gmail.como Password: If you wish for Outlook to save your password, check the box labeled Remember Password and enters your password in the text field.o Click More Settings...

- Click on the Outgoing Server tab, and check the box labeled My outgoing server (SMTP) requires authentication. Then choose to Use same settings as my incoming mail server

- Click on the Advanced tab.
- Under Incoming Server (POP3), the port number should be set to 995.( Depend on service provider ports )
- Under Outgoing Server (SMTP), the port number should be set to 465.( Depend on service provider ports ) The above mentioned ports are applicable for all email client includes Gmail & Yahoo Etc

- if you want to leave a copy on the server other wise remove check mark from " Leave a copy of messages on the server '
- click ' OK ',
- Click ' Next and click ' Finish.
Thanks You ............................! For More Tech updates keep visiting
www.santhoshtechpro.blogspot.com
No comments:
Post a Comment